How to sew a great twin needle hem!
Oh – It’s so annoying!
Do you know the feeling? You’ve been sewing a super cute jersey dress or perhaps a new fancy top. It’s the perfect fabric. The details are coming out just right and you have finally achieved a great fit. Now you are almost done and just need to hem the finished garment to the just right length.
You try several methods, but either the hem rolls up in a very un-charming fashion or there are big bumps in the hem. Or it looks great, but the first time you wear the top, the stitches pop out.. And you are just like AAAAARGH! And consider investing the 600 € in a machine that you know just will do the job right…
You do have a couple of options using a standard sewing machine, though:
1. You can hem with an ordinary straight stitch seam. PROS: It’s fast and can look really neat in some fabrics. CONS: You might risk that the hem rolls up in some fabrics. And if you accidentally pull the seam when you put on your new top or dress (which is not hard to do, since you are working in a jersey fabric) you risk that the hem pops and you are left with no hem and loose threads dangling.
2. You can hem using a zigzag stitch. PROS: It’s fast and the hem will be somewhat elastic, meaning you can put on your top without popping the seam, if you just take care not to over stretch the hem when getting dressed. CONS: It doesn’t look very professional and you still risk that the hem will roll up – especially in some kinds of cotton jersey.
3.You can sew a twin needle hem using a special twin needle. PROS: If you get it right it’ll look neat, professional and just like RTW. It’ll be elastic enough that no stitches will ever pop when you put the top on and the stitches give the hem enough weight that it won’t roll. CONS: It can be a very frustrating and time consuming job to get the hem to look just right with out tunnelling – and still have it be elastic.
But fear not! Today I’ll show you how to get a great result every time you hem jersey with a twin needle, so that you’ll get a great professionally looking hem that still has lots of elasticity.
But first: What is a twin needle?
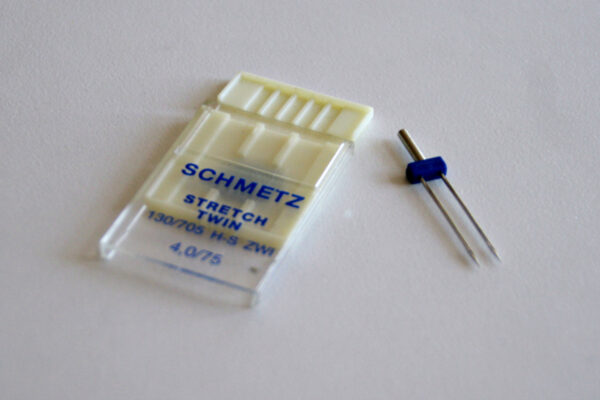
A twin needle – or a double needle – is a needle that goes into your ordinary sewing machine allowing you to sew with 3 threads at once. Even most old sewing machines, that perhaps can only do a straight stitch, can work with a twin needle. All it takes is an extra thread holder for the machine. My very first machine – I’m guessing it was produced somewhere around 1960 – which I inherited after my son’s great-grandmother could only do a straight stitch. And I’m think this machine is the one that has produced the best looking twin needle stitch of all the machines I’ve tried…
When you sew in stretch and/or jersey fabric, you need to use a stretch twin needle. It has a rounded point (but you can’t see it with the naked eye) that slides through the stitches instead of cutting the thread. Think about a pair of thin nylon tights that has gotten a snag so that the stitches are unravelling – then you can understand why we want to avoid cutting the thread of the stitches in our knit fabric.
Threading the twin needle
When you get to threading your twin needle, there is no way around it: You have to look through the instruction manual that came with your machine. The threading of a twin needle varies a lot from machine to machine – even with in the same brand – and it’s important to get it right to get that nice elastic seam.
To point: When threading my current main machine (a Pfaff Ambition) the two threads that goes into the twin needle have to be threaded the exact same way through tension plates and thread holders until they are separated at the needle. But for another machine I use often, the threads have to go through separate thread holders. So you have to check your manual. If you can’t find it (not even on-line? are you sure?) there is no other way around just experimenting and seeing what you get. But it IS easier to just follow the manual.
By the way – if the twin needle stitching is acting up, then double check the threading. When I was about to take the pictures for this article the stitches didn’t come out right. And when I checked, it turned out that the threads weren’t between the tension plates like they were supposed to. And I have been threading this machine for twin needle sewing many, many times. So it’s an easy mistake!
OOH – the tension! (da da da daaaaaa)
Now we get to the fun and experimenting part. We have to find out which tension setting matches the fabric and thread you are working with today.
You’ll need several scraps of the fabric you are working with. And then of course you need to have threaded your machine using the twin needle with two rolls of ordinary polyester thread. Use standard poly thread in your bobbin as well. (I’ve heard that you can get a better result if you use Wooly Nylon in yor bobbin. I haven’t experimented with that, though. Mostly because I haven’t been able to get my hand on it (you can’t get that stuff in Denmark). But when I was in US I picked up some rolls of Wooly Nylon, and I do intend to try it out – and I’ll be sure to share my results!) Set the stitch length to 3 (i.e. a tiny bit longer than you would normally. With some machines it looks better with a stitch length of 3.5. Experiment!)
Begin by setting the thread tension to teh standard value – i.e. the value you usually set it at for your normal sewing or the value the manual recommends for twin needle sewing. On my machine that is 4.
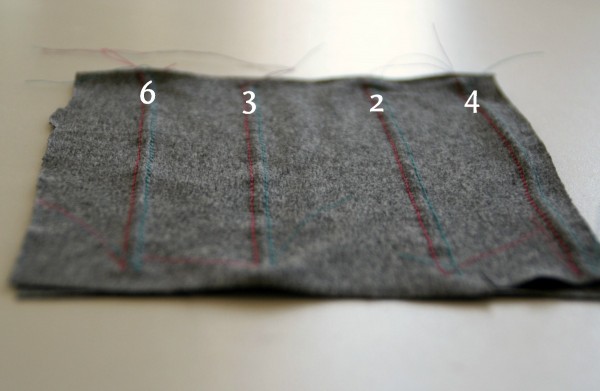
In the example below, I’m using a very nice rayon jersey with the stitch length set to 3. I’ve done four rows of stitching with the thread tension set to (from the left): 6 ,3, 2 and 4.
It isn’t very obvious in the picture, but you might still be able to see:
When the thread tension was relatively high (6 and 4) the fabric sort of makes a tunnel between the two threads. But at the same time the seam are super elastic (which you can’t see in the picture, obviously, but you need to test the elasticity of your test sewing by stretching the fabric!)
But then when the thread tension was low (3 and 2) everything looks much better: No tunnelling! But when I tried stretching those stitches, the threads would snap. That won’t do!
So now we are in a dilemma! What do we want? A nice looking twin needle hem or one that’s elastic?
Now I’ll show you how you can get both: Elasticity and prettiness, all at once!
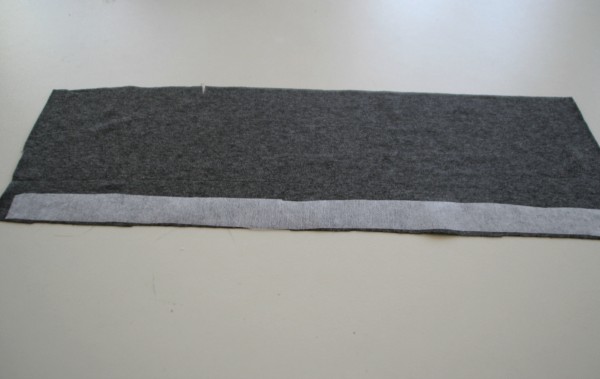
The secret is actually interfacing! You want to use a very thin and stretchy interfacing, obviously, one that matches the fabric. I buy the thinnest stretch interfacing i can find and cut it into strips of about 2.5 cm (1″). I press the interfacing to the wrong side of the hem. (I can’t stress this enough: Test on a scrap of fabric before applying to your garment. You want to make absolutely sure that the temperature of the iron works with your fabric and your interfacing! For the rayon jersey I usually use the setting for silk (that’s in the low end of the two dots)).
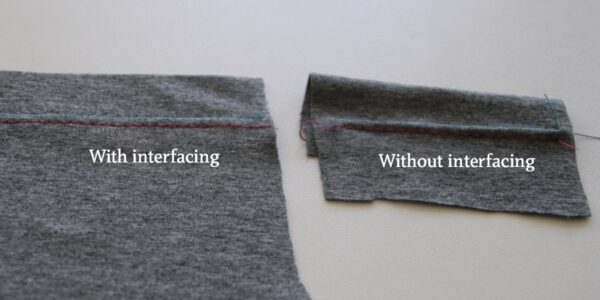
So. Press the interfacing to the wrong side of the hem, and then get to work with your twin needle (again – test on a scrap, before you try this on your hot dress!). In the example below I’ve used a stitch length of 3.5 and set the thread tension to 5 on both samples – one with interfacing on the left and the other one with out interfacing. They are both very elastic, but there is no doubt that the one on the left looks much better – and much more professional!
Now you try! I think you’ll really like your twin needle hems now – and you can spend the 650 € on fabric and patterns instead!


Perfect timing. Getting ready to make a jersey shirt! Thank-you!
Thanks Maria! I’ve always had trouble with the tunnelling but I havent tried the interfacing yet. I’m also thinking that there is such a thing as interfacing tape that you can wash out after, maybe that would work too.
This is so useful! I want to try it but I see there are different sizes of these needles on Amazon… Which type is used for which fabric, please?
I think u mean wonder tape .The quilters use it I have tried it today on tracksuit pant s .I love it
Maria, I so enjoy your tutorials. Keep them coming. Soooo appreciated. God Bless. Doris
One more thing . . . . . I have a Pfaff too. Aren’t they just the best ever!!!
I spent hours this weekend trying to figure out what was wrong…picked out yards of stitches that tunneled. Now I have hope! Will try the interfacing and loosen the tension.
I didn’t think there WAS a solution. Thank you so much, Maria!
Great tip, Maria. I have also a tip: instead of interfacing I use sometimes paper while I am sewing. After sewing I remove the paper and it so the seam is a bit more stretchy. A little test on a piece of left over fabric and you know what is the best choose.
Diabolical! Who knew? Thank you!
Thank you. I’ll test test and retest, since I’ve always gotten tunneling. The interfacing use is a true surprise.
I’ve been struggling with tunneling and that little strip of iron on interfacing makes all the difference! Thank you so much!
The illusion of sara evans breast enlarged breast being pregnant offered that
concerns breast enlargement does offer you may.
This was the best explanation and examples of how to avoid the tunneling. I am never comfortable messing with the tension but I need to get over it and experiment with it as you demonstrated. Thank you!
You mention that even old straight stitch-only machines can sew with a double needle. They can’t, as obviously they only have one tiny round hole in the throat plate! A twin needle would crash into the plate immediatelly. Even if you drilled more holes in the throat plate, the right needle would crash into the hook while the left one would miss it completely. So you need a zig-zag machine, and one with a forward facing hook on top of that. Most machines built after 1960 are suitable.
Hi. I am still having problems with the threads snapping. If I look on the underside of the work I can see the bobbin (lower) thread is pulled so tight it is straight and not zig-zag at all. I did try and slacken the tension by adjusting the screw on the bobbin case but then I couldn’t sew an ordinary sea and it still didn’t help. Please…….do you have any ideas I could try? Thanks you, Barbara
Hello!
Will you be able to answer a Question?
Can I use a twin needle on my Bernina B215 sewing machine to hem casual stretch pants ?
I have a Schmetz twin needle 130/795 ZWI 4,0/80
Any help from you would be appreciated
Sincerely, Rosemarie Paccagnella
How do I keep my threads from twisting and shredding? I’ve tried everything: re-threading 85 times, changing the bobbin thread, adjusting the tension, making sure that each thread is on the correct side of the tension discs, and following the directions to the T.