Empire seams are horizontal seams that join the bodice and the skirt parts of a dress – typically placed right underneath the bust.
And the thing is – empire seams need to be placed precisely underneath the bust to look right!
When you are making a dress such as the Lammefjord Dress or the Signe Dress, both of which have empire seams, you might need to adjust the placement of the empire seam.
This is especially true if you have a larger bust, if you have a lower bust, or if you are longer from the under-bust to the shoulder than the pattern was drafted for.
If you are taller (or longer in the bust – under shoulder area) you will need to lengthen both the front and back bodice pieces. You can see more on how to do that here and here.
sIn this article, I’ll show you how to add length to only the bodice front piece.
How to determine how much – and where – to move the seam
I wish I could tell you a magic way of determining the right placement of the seam for you.
The thing is, a lot plays into where the seam will nest: Obviously the actual length of your shoulder to underbust measurement compared to the pattern’s. But also the weight and stretchiness of the fabric and the shape and size of your bust. Even the bra you are wearing makes a difference!
Which means that the best and simplest way to figure out if you need to adjust the placement, is to sew up a quick muslin of the tunic version of the pattern and see where the seam lands on you. If it doesn’t land under the bust, you might need to lengthen the bodice.
Once you have the tunic muslin, you can put it on and evaluate. Confirm that you only need to lengthen the front (if your seam rides up in the back or the sleeves are too tight, you need to lengthen both front and back, as I mentioned before). And then measure how much extra length you need at center front for the seam to nest just under your bust.
How to make the pattern adjustment
Now, the Lammefjord Dress has a lot of room for the bust already built into the pattern: There are gathers at the shoulder and at the center-front. So you have plenty of wiggle room (or ease) for larger bust sizes. But if you are working with a pattern with less ease – or have a much larger bust – you might need to add room to the bust using your usual method before fixing the seam placement.
In this article I am showing the alteration on the Lammefjord front bodice piece.
Here is the front piece with seam allowances included.
My first step is to mark where I want to make the alteration. In this case, I don’t want to change anything at the side seam or sleeve area or to the hem of the bodice piece, so I draw a line from center front, right at where the seam starts, to the corner of the side seam/hem.
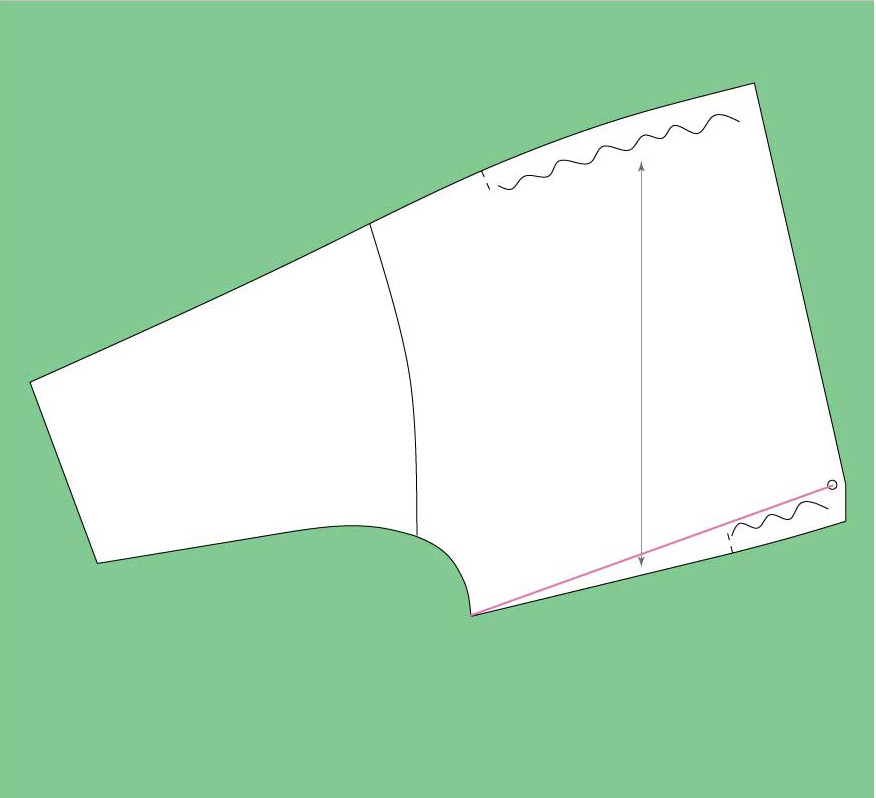
Then I cut from the center front seam allowance to the seam corner at the side seam/hem. I am leaving a small paper-hinge at the side seam.
I spread the pattern open at center front the amount I need to lower the seam. In this case it’s 2.5 cm (1″).
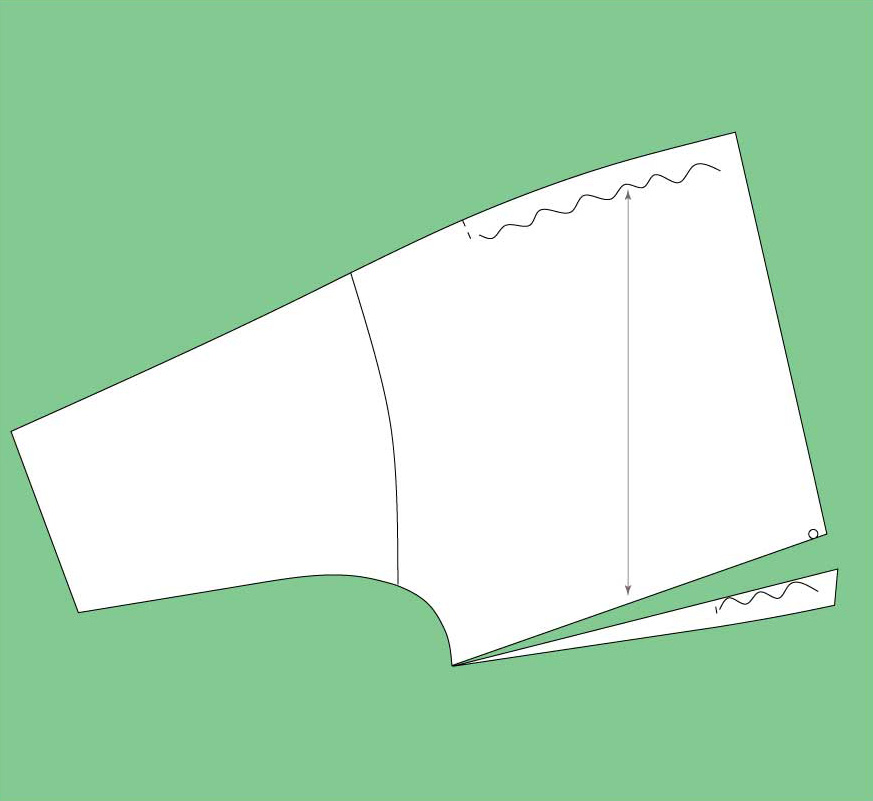
I place a piece of pattern paper underneath the cut and tape it in place.
Then I draw a new center front seam.

All that is left to do is to trim the pattern paper, and I am ready to cut my new dress







thanks for addressing this. Should I be choosing a size based upon my upper bust measure or the full bust? I’m pretty sure I’m a bigger cup size than this is drafted for.
I recommend you pick the size based on your full bust. The pattern is not really drafted for one bra cup size, but rather graded and drafted to reflect the natural size ranges. But always make a test garment first!