The great thing about sewing is that we are all designers and we are all able to get clothes that fit us well and make us look and feel even better.
But yet many people just sew up the patterns straight out of the envelope (or printer, as may be the case) with out enjoying the possibilities for individual fitting. Some may not do it, because they don’t know how.
SO I thought I would do a series on fitting and altering different kinds of t-shirt.
While there are many ways to fit garment and almost as many books instructing how to, most of them merely talk about fitting woven fabric garments. And while I’m a big fan of tissue fitting, it just will not work with a pattern with no or even negative ease.
According to Celia (The Palmer/Pletch instructor I interviewed for the Twin Needle podcast (a bonus episode from April ), the forward shoulder alteration is one of the most common needed alterations today.
This is because, as we spend more and more time at the computer and sewing machine, we round our shoulders bit by bit. Luckily it’s a very simple alteration!
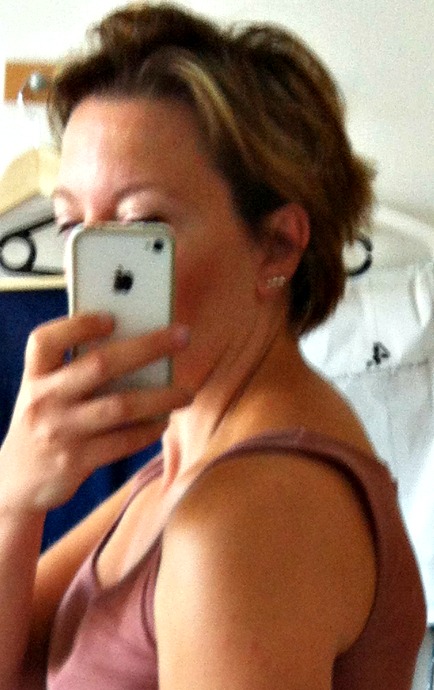
I have quite a lot of forward-shoulder-ness (damn being in a computer literate family who had PC before anyone else and also sewing since child hood. And writing a lot… ;-)) – meaning that the outer part of my shoulder turns forward.
This alteration is the same whether you are working with a woven or a knit shirt. And I should mention that I’m just following the directions from Fit for real people (page 162).
I usually do a kind of big alteration of 12 mm (as I have very forward shoulders). To determine the amount you need, wear a shirt (with a shoulder seam, of course, raglan won’t work) and look in the mirror. Then place your finger at your shoulder point, and figure out how much you need (maybe getting somebody to measure it for you) to move the outer point of the shoulder seam.
The rest is easy:
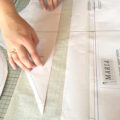
You are moving the shoulder (outer) point of the shoulder seam towards the front, so you need to take some off the front shoulder and add some to the back shoulder:
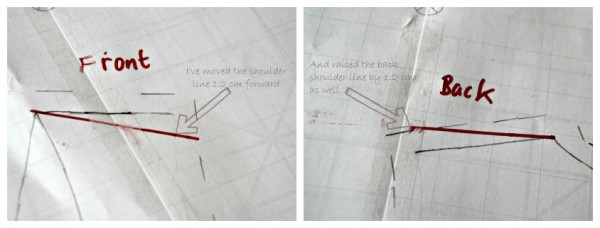
I’ve rotated the shoulder seam forward 1.2 cm (the red line) by taking it down in the front and up in the back
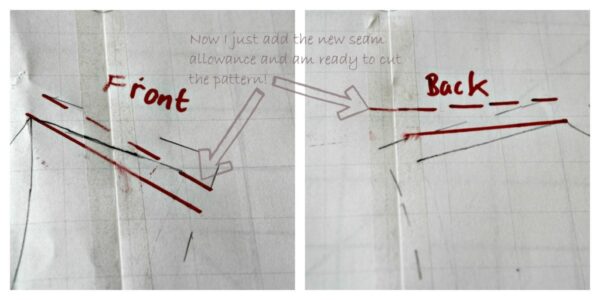
Then just adjust the seam allowances, too.
And voilá! Ready to cut!
Do you have any fitting issues you would like me to talk about here? Please let me know!




I haven’t encountered this alteration yet, but maybe I should look at myself in a mirror from the side :) thanks a lot for sharing this, it doesn’t look too complex!
It is really easy. The way I realized that I needed this (besides being told:-) was that shirts always seamed to be to high in the front – and too low in the back. And then getting my picture taken from the side…
Thank you Maria! This is very helpful reminder. I work with a computer all day and my shoulders are pretty round! But I tend to forget so shoulder alterations and focus more on fba.
Oh! About the fitting problem I have.. would you happen to know how to do a forward head adjustment on the pattern?
Sure!
If head sits forward on body (i.e. the shoulder seam doesn’t align with the back of the ear) you move the entire seam line (not just the shoulder point) forward.
Thank you, MAria!! That is quite easy to do.. I’ll give it a try.
Thanks for this tutorial. I had better look in the mirror too. Maybe I should think about good posture! Any tips for fba in tshirts without darts or with raglan or kimono sleeves?
Oops, I just found all your other blog posts on fitting tees. Thanks
Great!
I will be doing a post for an FBA on a kimono tee very soon :-)
I have recently started to make this alteration too. Like you I have been sitting in front of a PC for years. Tees look so much better. Now I am trying to alter my sleeves too…wish me luck!
Thanks for this great tutorial. Because of scoliosis, my right shoulder is very much lower than the left one. So I need to learn to make a forward shoulder alteration to every pattern I use, except raglan sleeves, of course.
I am having trouble altering the sleeve cap to fit once the shoulder has been altered, though–I am a beginner at sewing).
Could you help me with this? Thank you!
Hi Manuela
Usually I don’t do anything to the sleeve. It depends of how much of a forward shoulder alteration you are doing, of course. But I just let the sleeve hang like I would without the alteration, but don’t match the shoulder points.
However. If this doesn’t work for you, you might need to rotate the sleeve a bit. I found this tutorial on how to do it, which might help you until I get the time to make a more general tutorial on the subject: http://phatchickdesigns.blogspot.dk/2009/02/tutorial-altering-sleeve-for-forward.html
Thank you!!!
I’ll study the link you provided–whenever you have a chance to make a tutorial about this, it will be wonderful. Thank you again.
I do need to alter the sleeve because the fabric wrinkles and the fitting is really poor otherwise (my shoulder is really much lower then it should).
I have a quick question about this. When setting the sleeve, do you match the dot with the original shoulder point or with the new point? Thanks!
Dear Ginger
In knits, I match the sleeve with the original shoulder point – i.e. I don’t match the sleeve shoulder point with the shoulder seam, but place it where the shoulder seam would have been, had I not moved it.. Does that make sense?
Thanks for the tip about wearing a seamed shirt and measuring. I really need to start doing this adjustment, I have very rounded shoulders :/
You are very welcome. It is sometimes the simplest things that makes the difference!
Moved my shoulder seam 5/8 from back & removed from front seam but pattern continues to pull to back
Thank you so much for posting this! I have been working on fit for a couple years and trying to figure out what additional adjustment(s) I need & your photo helped me realize this might be one of my problems too! I’m definitely going to try this on my next project & see if it helps – thanks so much!! :)
Hi Amanda!
I’m so glad you like it! Let me know how it works out for you!
Is forward shoulder what causes a gapping at the back of a sleeveless dress ir is that due to something else?
Thank you for this article